Friday, September 30, 2011

I Clearly Have Issues

The kids and I went on a playgroup outing this morning.  We carpooled with another mom with her two kiddos – the same ages as mine.  On our way out of town, I noticed a small pile of items on the side of the road.  It looked like they were for free, but I wasn’t sure.

On the way back, I noticed the pile again.  There was something that had caught my eye earlier but I didn’t want my new mommy friend to think I was a freak so I didn’t ask her to stop…  though rest assured in my head I was yelling “STOP THE VAN!”

I took it as a sign the universe was telling me to go visit my grandfather today because not only did I have my contacts in (he has no idea who I am when I have my glasses on but thinks I’m my mom with my contacts) but said item was less than a mile from the nursing home.  So later in the afternoon, I packed the kids in the jeep and headed out for a visit.

I drove by said pile a third time.  I couldn’t see a sign and my inner turmoil talked me out of stopping.

On the way back home one last time, I was driving by really slowly looking for a sign….  and then I saw it – a teeny tiny sign on the pole above the pile of stuff.  “FREE.”

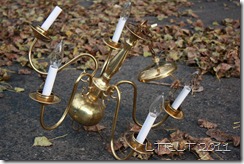
Tires squealing, I pulled over and tossed the one item I was after into the hatch back.

IMG_7373

After I break it to my husband, I’m going to have him check the wiring before I make the final call as to what I’m doing with it.  If the wiring is good, it’s getting a pink and sparkly makeover for Monkey’s room.  If the wiring is bad, I’ll rip it out and turn it into a candelabra of some sort, probably for the sun porch.

Have you found any treasures on the side of the road lately?
Thursday, September 29, 2011

My Wood Pumpkin was Featured!

In all of the excitement of the vomit and the party and a trip down south, I almost forgot all about this.

I was so excited to see I’d been CAUGHT!

i-was-caught-SLOW[1]

My cute little wooden pumpkin was featured by Gail.

IMG_7224_thumb%25255B8%25255D[1]

I am honored my scrap wood is among such creativity.

Barn Light Electric Giveaway!

During my meandering blog readings, I’ve recently discovered Barn Light Electric – and quickly fell in love.  So many wonderful light fixtures – so few places to put them!

Well, they are having a GIVEAWAY!

barn_light_online_giveaway[1]

And now, I day dream.  *eyes glazing over, staring off into dreamland*

I could see this over my kitchen sink.  It would fit in wonderfully.

benjamin_aero_red_stam_thumb_350[1]

Or this one over my kitchen workspace.  I could see redesigning my entire kitchen around this rustic beauty.  Yes, yes I could.

5313_RBZ_thumb_350[1]

This chandelier would look amazing over the farmhouse table I’m hoping to build this spring.

product_detailed_image_29872_124_thumb_350[1] 

Or a few of these little beauties in my office and craft space (which should hopefully be receiving some love in the coming month).  I’d love to get rid of the box lighting in there.

BLE-DB10-P-JD-CH[1] 

So much eye candy.

How could anyone choose?

In order to participate:

1. Look around online at Barn Light Electric and pick lights you'd love to win.

2.Share your picks on your blog and link to the lights if you can.

3.Copy and paste these rules at the bottom of your blog post.

4. Once your post is up, you must email your blog link to: contest@barnlightelectric.com to be qualified to win. The contest ends October 12th, 2011.


What fun!

Throwing a Party

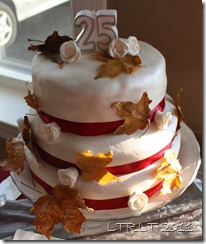
My aunt and uncle recently celebrated their 25th wedding anniversary.  My cousin decided to surprise them with a party.

He booked a party room at a local restaurant but wanted to make the cake on his own - with some help from me.  Neither of us had any real experience using fondant, but he had his heart set on finishing the cake with it.  After a couple of trial runs, we felt we were prepared to make a nice looking cake.

I ended up out of commission on Friday (getting over either a 24 hour bug or food poisoning – I’m not sure which but it wasn’t fun). 

PANIC!  We need to make cake!!

T saved the day by baking two of the three layers for us.  My cousin came after work  to bake the third layer, make the butter cream crumb coat and make the chocolate ganache filling.  By that point in the day, I was able to peel myself from the couch for small spurts so I was able to show him what he needed to do.  The day ended with 2 layers filled and crumb coated when we were supposed to be finished! 

EEEEK!!

We somehow managed to pull it out in the end on Saturday morning.

IMG_7268

I found ribbon in my ribbon stash (I think it was from my wedding six years ago, even).  The leaves (dipped in melted beeswax) and roses were a last minute touch.  I felt it looked too plain and you could see any imperfections in the fondant (and that the ribbon was a little too short.  Shhhh.)

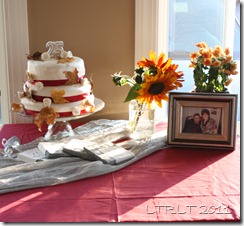
IMG_7269

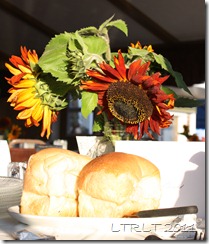
About a week before the party, he started to get nervous about decorations.  I went rummaging in my craft supplies and came up with a game plan – maroon and orange (not shown) fabrics on the cake and gift tables, a couple of potted mums off my front porch and mason jars filled with sunflowers from my garden for centerpieces.

IMG_7270

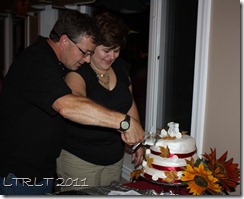
It all came together perfectly and we had a fantastic evening celebrating a wonderful couple.

IMG_7282

The best part?  The surprise didn’t get out.

Here’s to at least 25 more happy years!

Thursday, September 22, 2011

Jack o Lantern Fun

I snatched this idea from a friend on Pintrest earlier this week.

215918337_qfY4o6YG_c[1]

Source

But Jodi, that is a snowman and it’s fall.

Yes yes.  I know.

How about a jack o lantern instead?

IMG_7264

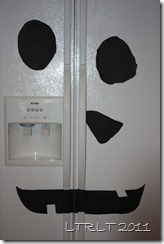
Monkey wanted to make a happy pumpkin.  I used white chalk to outline our facial features and Monkey cut most of it out.  I just used rolled scotch tape on the backs and let the kids put them where they wanted.

Easy peasy fun.

Sunday, September 18, 2011

A Princess Birthday

Monkey was invited to her first birthday party.  It was a princess party so I wanted to stick to the princess theme when looking for a  gift.

A quick search online and I found this adorable idea:

DSC_0882[1]

Source

The Princess and the Pea story book with a handmade princess with her mattresses to go with it. 

LOVE!

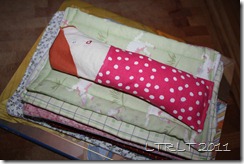
Here is my version:

 IMG_7259 

I got to go through my scraps stash and put some pieces to adorable use.

Next up – an embroidered gift.

Thursday, September 15, 2011

My Little Wooden Pumpkin

I found these adorable pumpkins while perusing the web a few weeks ago.

IMG_4461[1]

Source

I just happened to see them while our carpenters were here putting in our new windows.  I grabbed a few pieces of small scraps off the trash pile (ok – I grabbed more than a few but I set a bunch aside for future projects ;-) ), grabbed the drill and got to work. 

This:

IMG_7216

is now this:

IMG_7221

I knew the back wasn’t going to show so I screwed the 3 pieces of scrap together with a small scrap of strapping on the back.

 IMG_7224

I took the paints to it yesterday.

IMG_7232 

I like the new colorful addition to my fall decorations!

I found these pumpkins a few days later:

191877962_I4K0UQ0q_c[1]

Source

I’ve already found wood in the garage to make something similar to these as well.  I’m hoping to get to work on that today but it looks like rain so we may not be playing outside today.  Too bad.  I’m itchy to get started.

Next up – wreaths!

Linking up here:

small-fall-nesting[2]

catchascatchcan_1502[1]

Tuesday, September 13, 2011

Pintrest Inspiration

Fall Edition

Pintrest is such a great source for inspiration.  I find myself adding to my inspiration files on a very regular basis.

How cute is this?

151822862_uNDiFXAS_c[1]

Source

Simple centerpiece for a dinner party, perhaps?

169812513_q3B9dYd3_c[1] 

Source

It almost seems a shame to cut up an old book like this, but look how cute this pumpkin is!

169858404_vseAuulg_c[1]

Source

Our front door still needs a wreath.

176691090_41obr2vZ_c[1]

Source

Easy pumpkins – there is always scrap wood lying around here.

191877962_I4K0UQ0q_b[1]

Source

I think these adorable pumpkins need to hit my to-do list.

175571221_rAzhYszM_c[1]

Source

And after a hard day of crafting, enjoy some pumpkin cream cheese muffins.  YES, please.

184710355_mMX7qwVE_c[1]

Source

Oh yes.  I love this time of year.

We’re getting Halloween decorations ready…  and I may already have a pretty big inspiration file going to Christmas – gifts, projects and decorating.  Dangerous.

Linking up here:

Make a caption!P

Monday, September 12, 2011

Fall Fun

Yes, it’s mid-September but here in Northern Maine, the fall weather hit us this weekend.

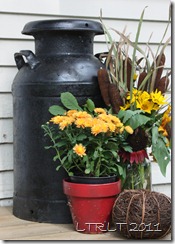
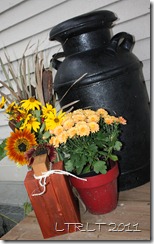
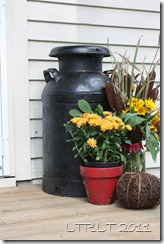
I picked up a bunch of mums to swap out my summer annuals, rearranged all of my outdoor vignettes and pulled out the Halloween tote.

Better.  My doors need some attention – and I have something fabulous in mind – but I’ve promised T I’d finish some other projects before starting anything new.

IMG_7214

Those poor milk jugs of mine needed some love.  The stone paint had all washed off in the rain.

Fresh paint and a fresh look.

IMG_7215 IMG_7216

I’d put our old wine barrel in the middle of a flower bed this spring and it ended up being covered by the flowers (I was not expecting 7 foot tall flowers!).  We moved it out to a more prominent position.

IMG_7217

We didn’t have any luck with the pumpkins in our garden.  I also haven’t found a new “go-to” pumpkin patch for cheap pumpkins.  So for now, this will do.

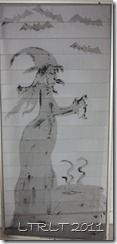
We’re getting our Halloween decorations ready with some new homemade goodies.  We’ll put them out in a few weeks but it doesn’t hurt to get ahead of the game in crafting!  My favorite so far?  This repurposed screen headed for the trash:

IMG_7218

I found a witch image online to mentally guide myself with, but I freehanded this bad boy.  I’m quite pleased with it.  I have a second trashed screen waiting for a similar treatment.

Enjoy the change in the seasons.


I’ve linked up here:

DIY Showcase fallfest

Finding Fabulous Frugaliciou$_Friday_button

anything-1[1]

features3[1]

wgw button[1]

small-fall-nesting[1]

Tuesday, September 6, 2011

Ch Ch Ch Ch Changes…

When we bought our new old house, we knew we were going to need to do some updating – the windows being one of the needed updates.

We went through last winter paying attention to which windows were in the worst shape and decided which ones to change this year.

Our carpenter is finally here this week.

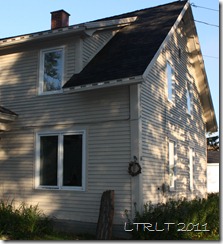
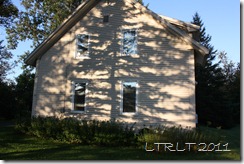
Before – exterior (excuse the shadows – I forgot to take my pictures until THAT morning – the sun was uncooperative):

IMG_7181

IMG_7180

Of course with an extremely old house, nothing can be simple.  The new windows are just a hair smaller than the old, which caused issues with the two big windows – particularly with the trim.

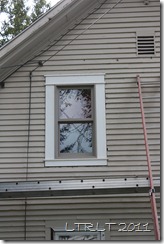
Our carpenter came up with a fabulous way to hide the problem – and it makes such a huge impact!

He is still up on the scaffolding working so I cropped him out just to show you the window.  LOOK at that trim!  You can see the difference with the window below it (old window).

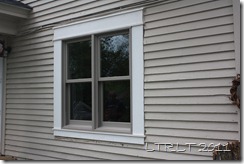
IMG_7198

The big windows make my heart go pitter patter.

IMG_7194 

T and I have been discussing paint colors.  The decision has finally been made that the house will get color-matched.  The trim will get an off white or cream, similar to it’s current primed color.

Next up, interior trim.  I can’t wait to see what he does for us inside!

Sunday, September 4, 2011

A Pintrest Breakfast

Pintrest has sucked me in (as it has many many other people).

I found a cute breakfast idea yesterday on a friend’s board.

Broccoli and Italian Sausage Egg Muffins

IMG_1055[1]

Source

Say WHAT?  Of course!  Everything is cuter as a muffin!

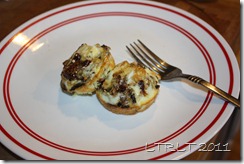
My version includes bacon and mushrooms because you know me….  I work with what I have.

I crisped up my bacon, chopped up my mushrooms and proceeded as normal.

VOILA!

IMG_7193

The possibilities with this one are endless!

Enjoy!

Saturday, September 3, 2011

It’s a box!

No, it’s a car!

What you need:

  • 1 cardboard box
  • 1 toilet paper tube
  • 3 paper plates
  • Glue (glue gun, craft glue – whatever you have)
  1. Cut 2 plates in half. 
  2. Attach to box with the flat part of your cut towards the floor to make wheels.
  3. Attach tube to flap inside box (on a short end of the box).
  4. Attach last plate to the tube to make your steering wheel.
  5. Let the kids have at it with paints, markers, crayons – whatever you feel like (or don’t feel like) cleaning up after – to decorate.

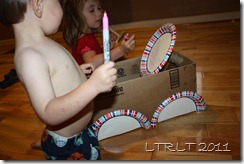
IMG_7191

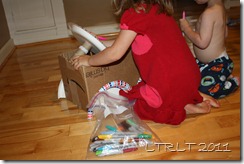
It took longer waiting for the glue gun to warm up than it did to assemble.  This will lead to a pretty full rainy day of fun.  I’m pulling out some stickers when the marker fun wears off.  ;-)

IMG_7192

Voila!  Look how crafty I was before 8 AM.

There’s been a lot going on here in the past month.  I have so many projects to share!  I’ll probably be able to while the kids are busy with the box car.  hehe

Related Posts with Thumbnails